Social messaging · 3–5 min
Connect Facebook Messenger
Connect a Facebook Page so your team can receive and reply to Messenger conversations in Flex54.
Before you start
Have these ready
- A published Facebook Page.
- Administrator access to the Page and Business Portfolio.
- Pop-ups enabled for this setup session.
Step-by-step
Follow these steps
- 01
Open Channels in Flex54
Find the Facebook card and click Connect.
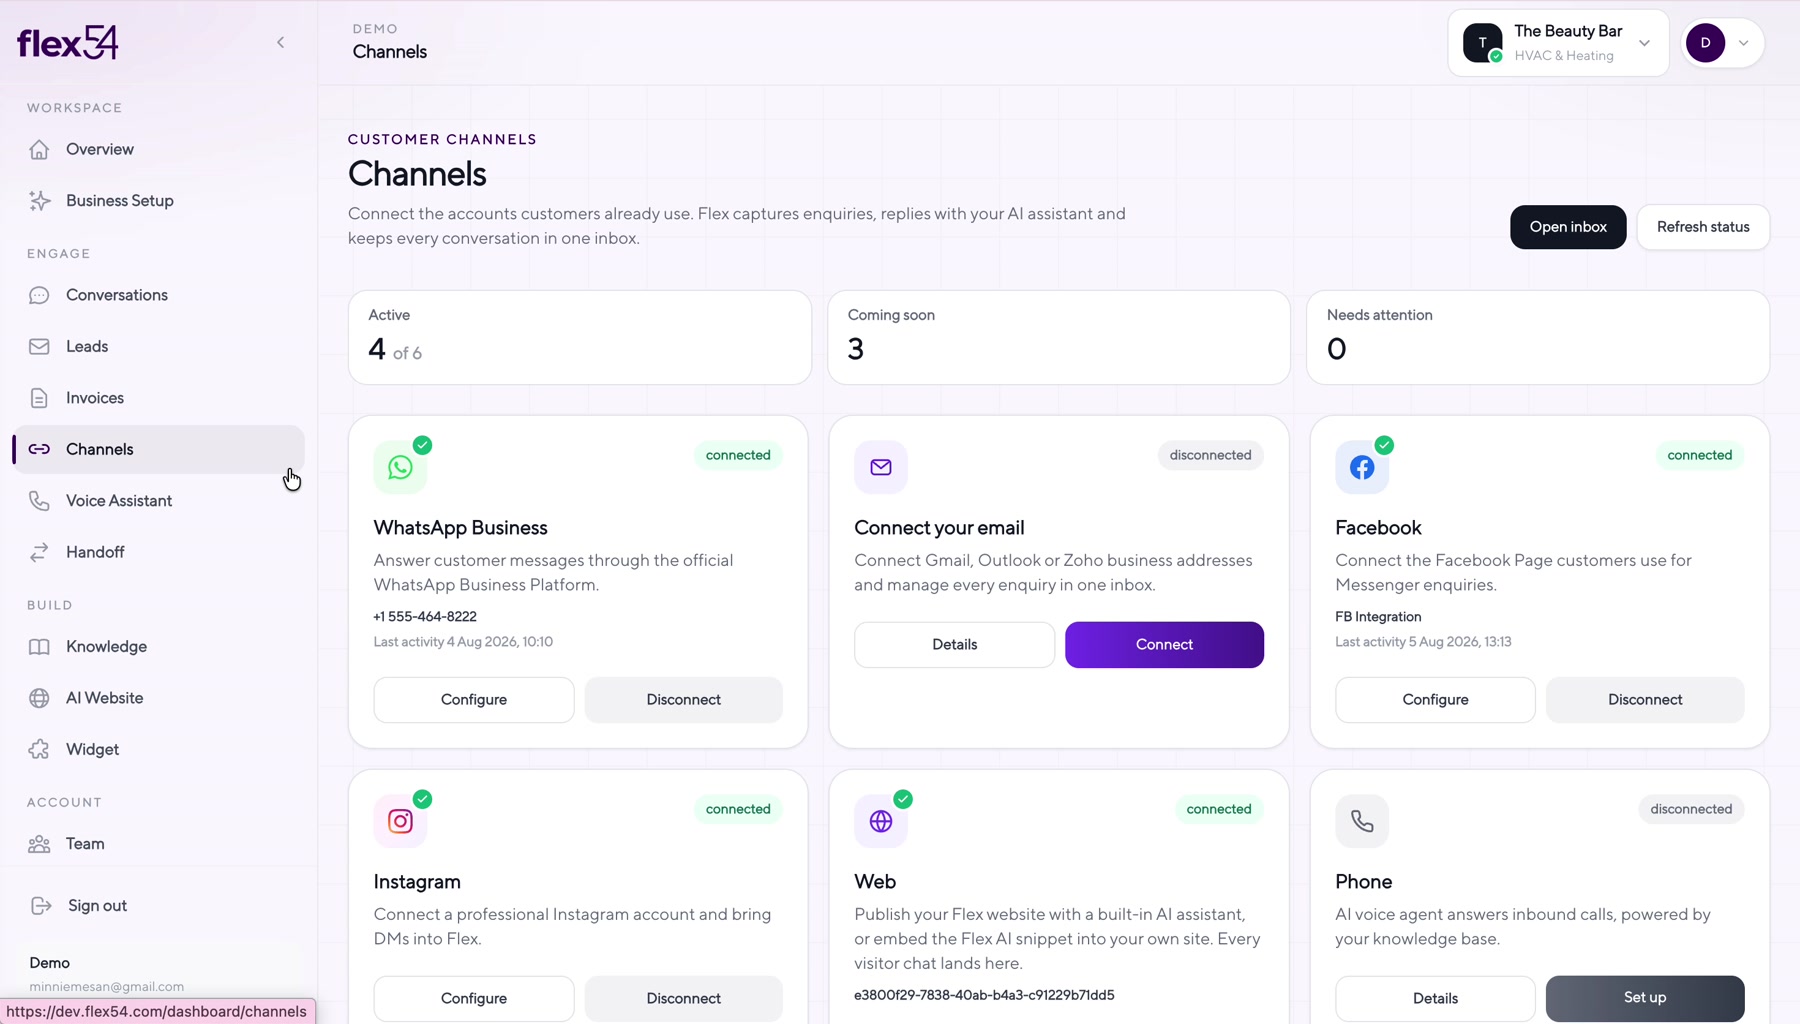
Example screen. Account names may differ in your workspace. - 02
Start the Facebook connection
Click Configure or Connect on the Facebook card. A Meta authorization window opens.
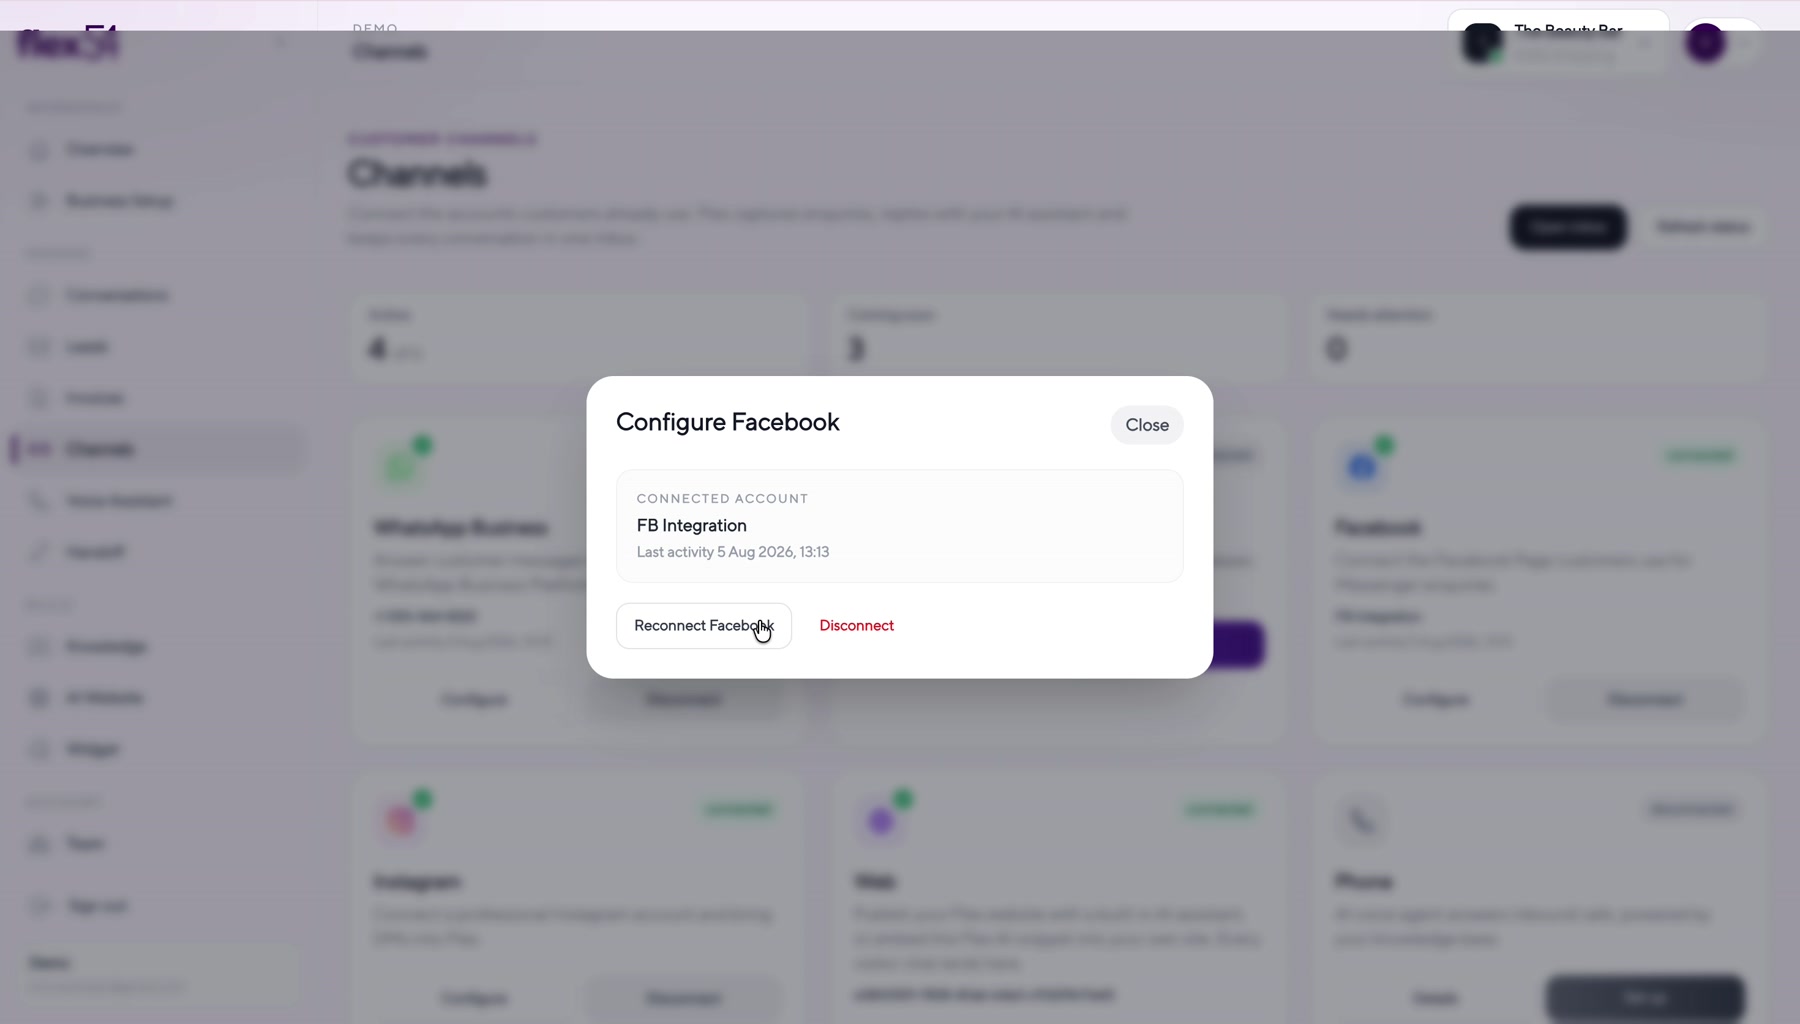
Example screen. Account names may differ in your workspace. - 03
Select the Business Portfolio
Choose the Business Portfolio that owns the Facebook Page you want to connect.
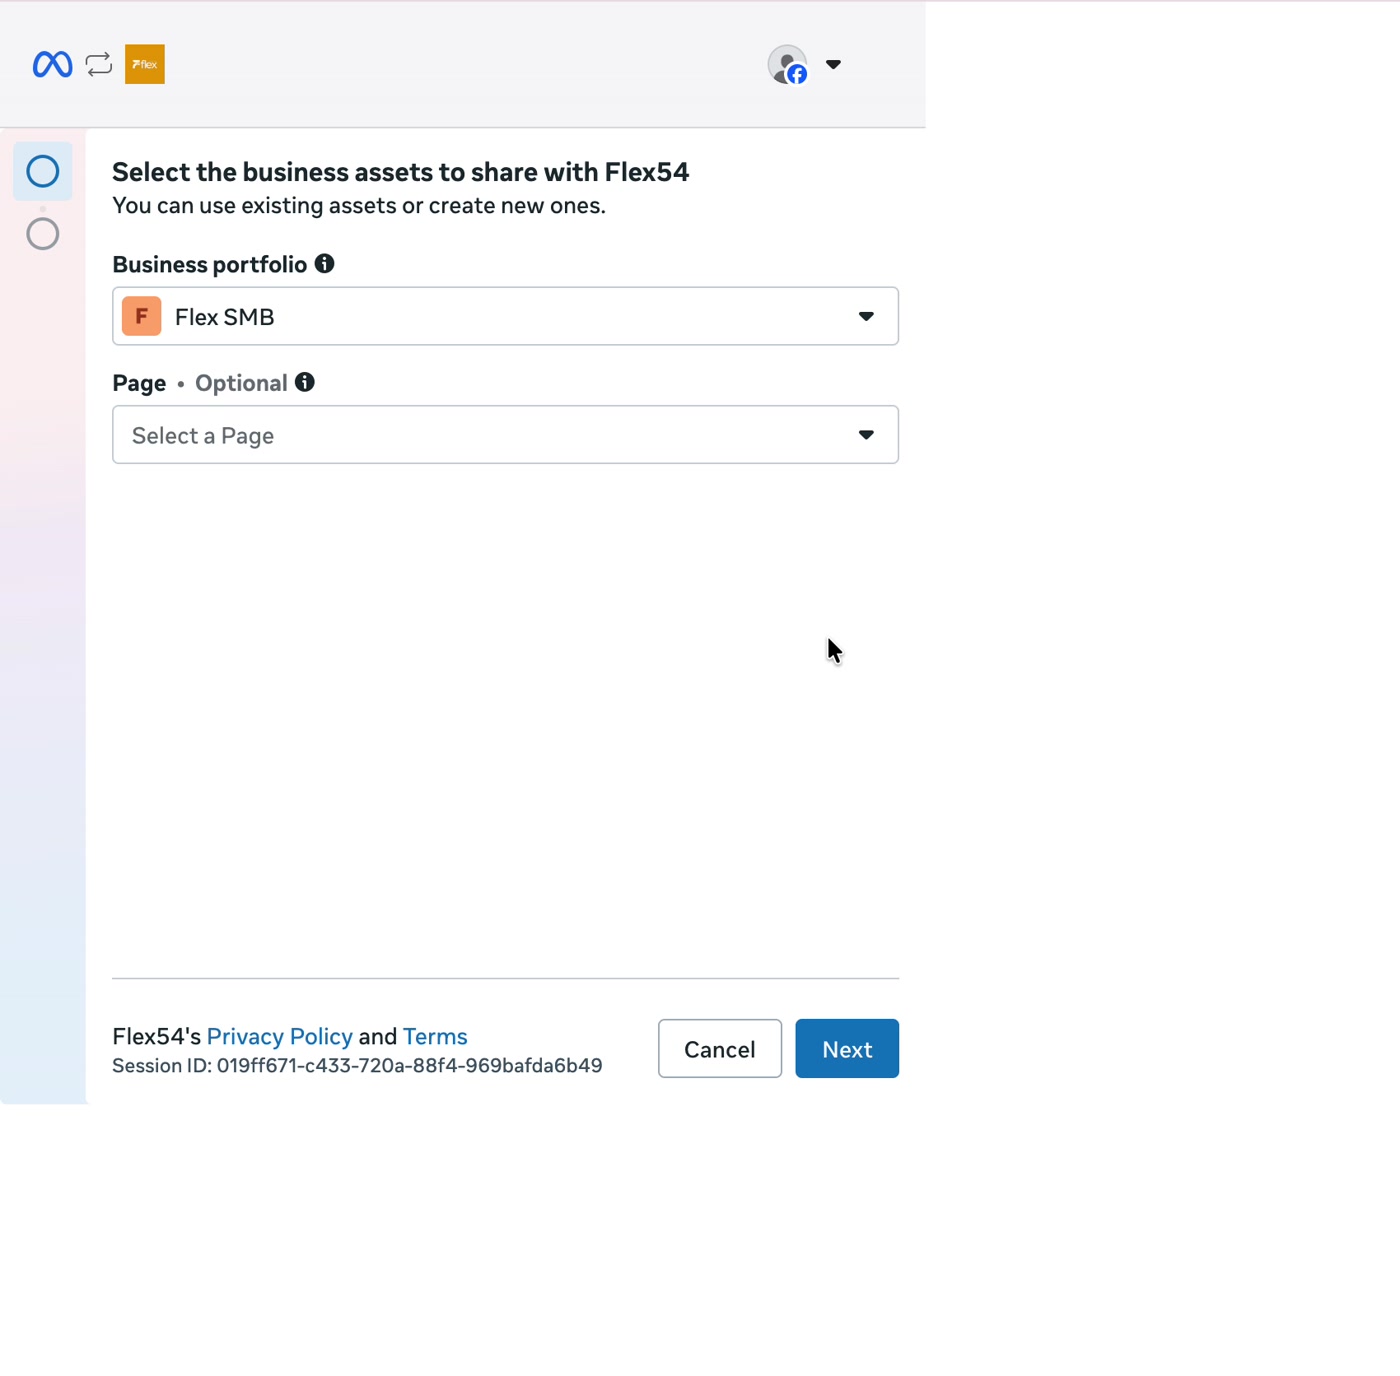
Example screen. Account names may differ in your workspace. - 04
Select the Facebook Page
Choose the correct Page and approve access.
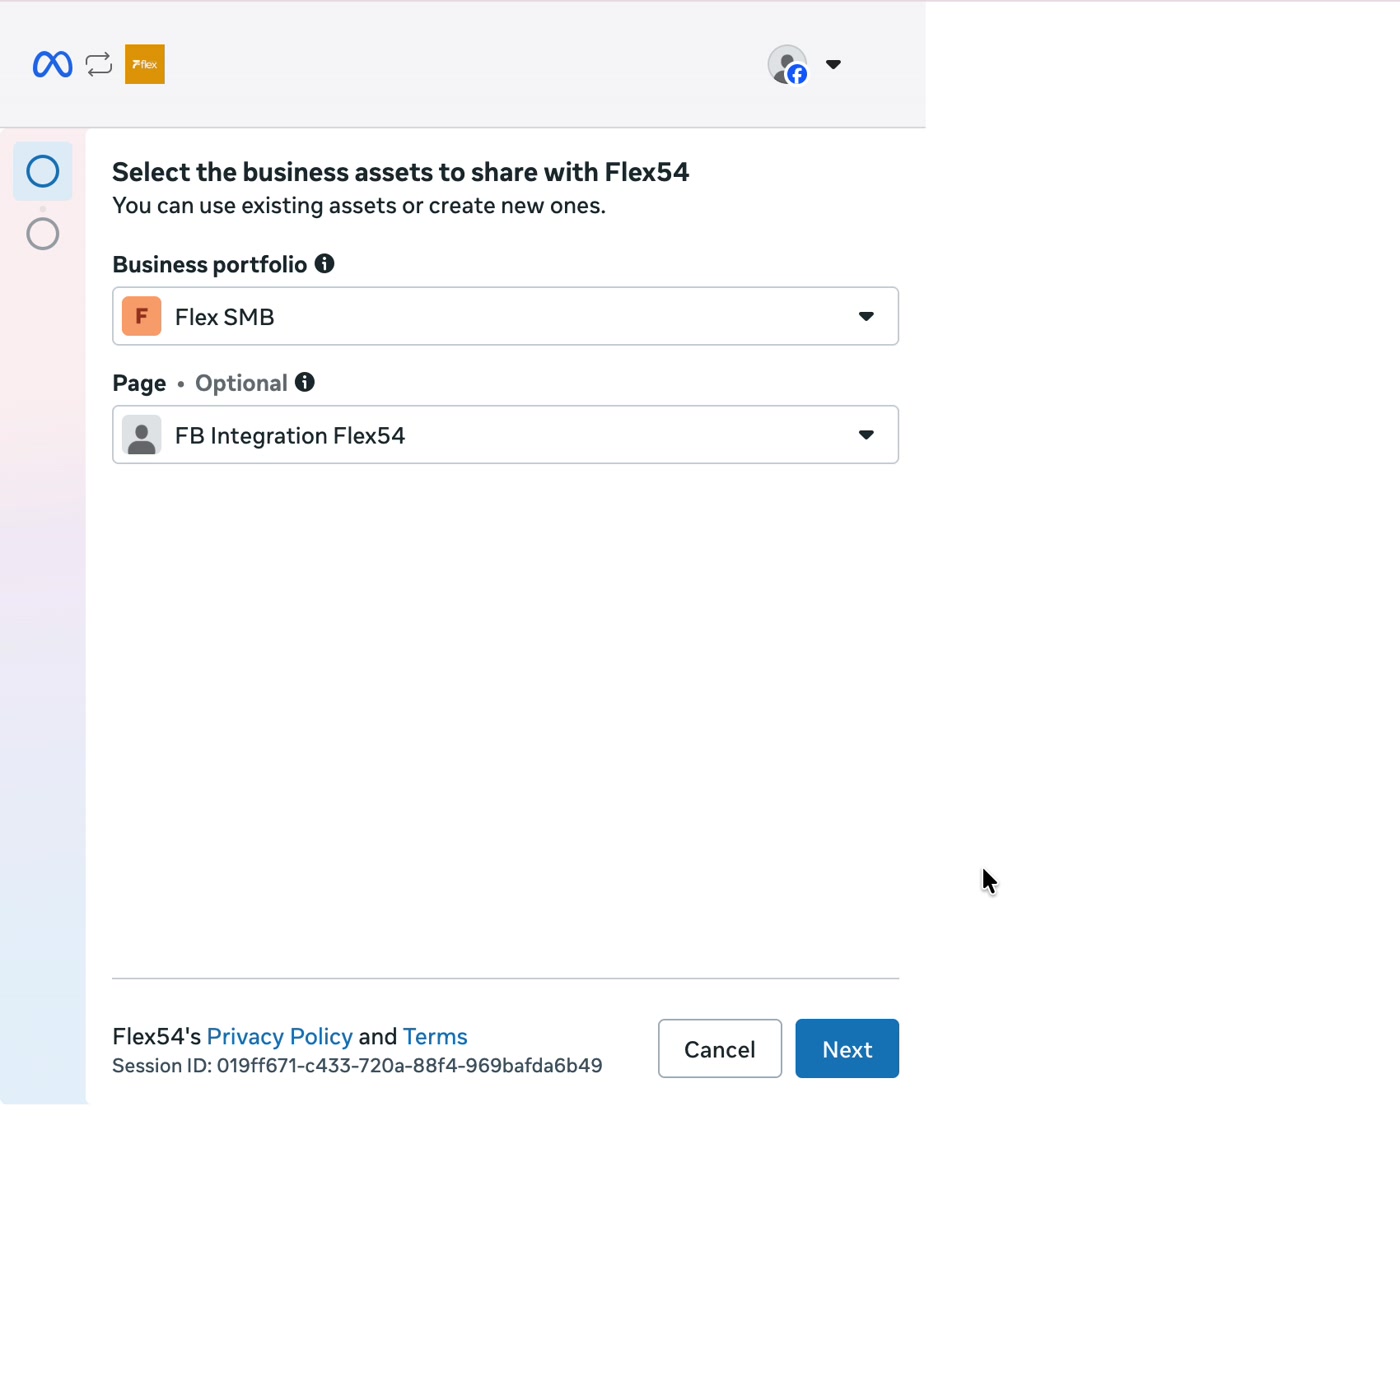
Example screen. Account names may differ in your workspace. - 05
Wait for Meta to connect the Page
Keep the window open while Meta completes the connection.
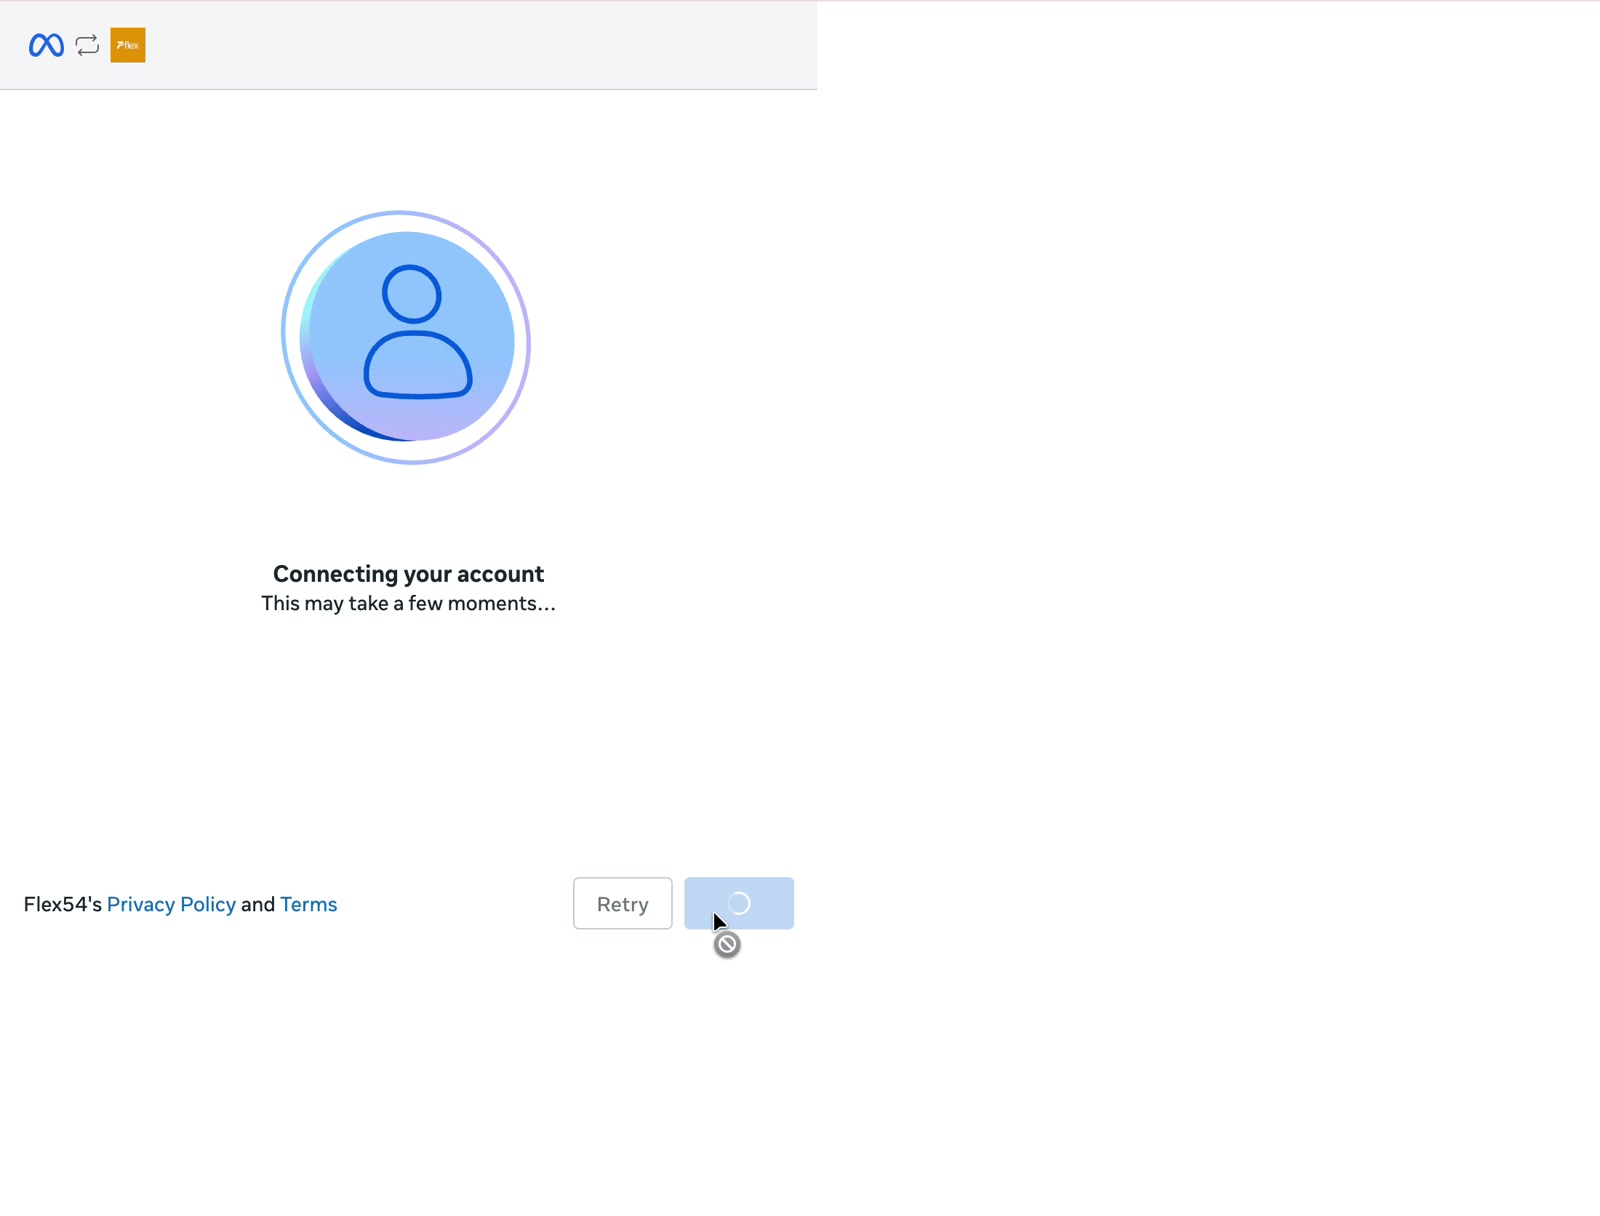
Example screen. Account names may differ in your workspace. - 06
Finish the Meta flow
When Meta confirms the Page is connected, click Finish to return to Flex54.
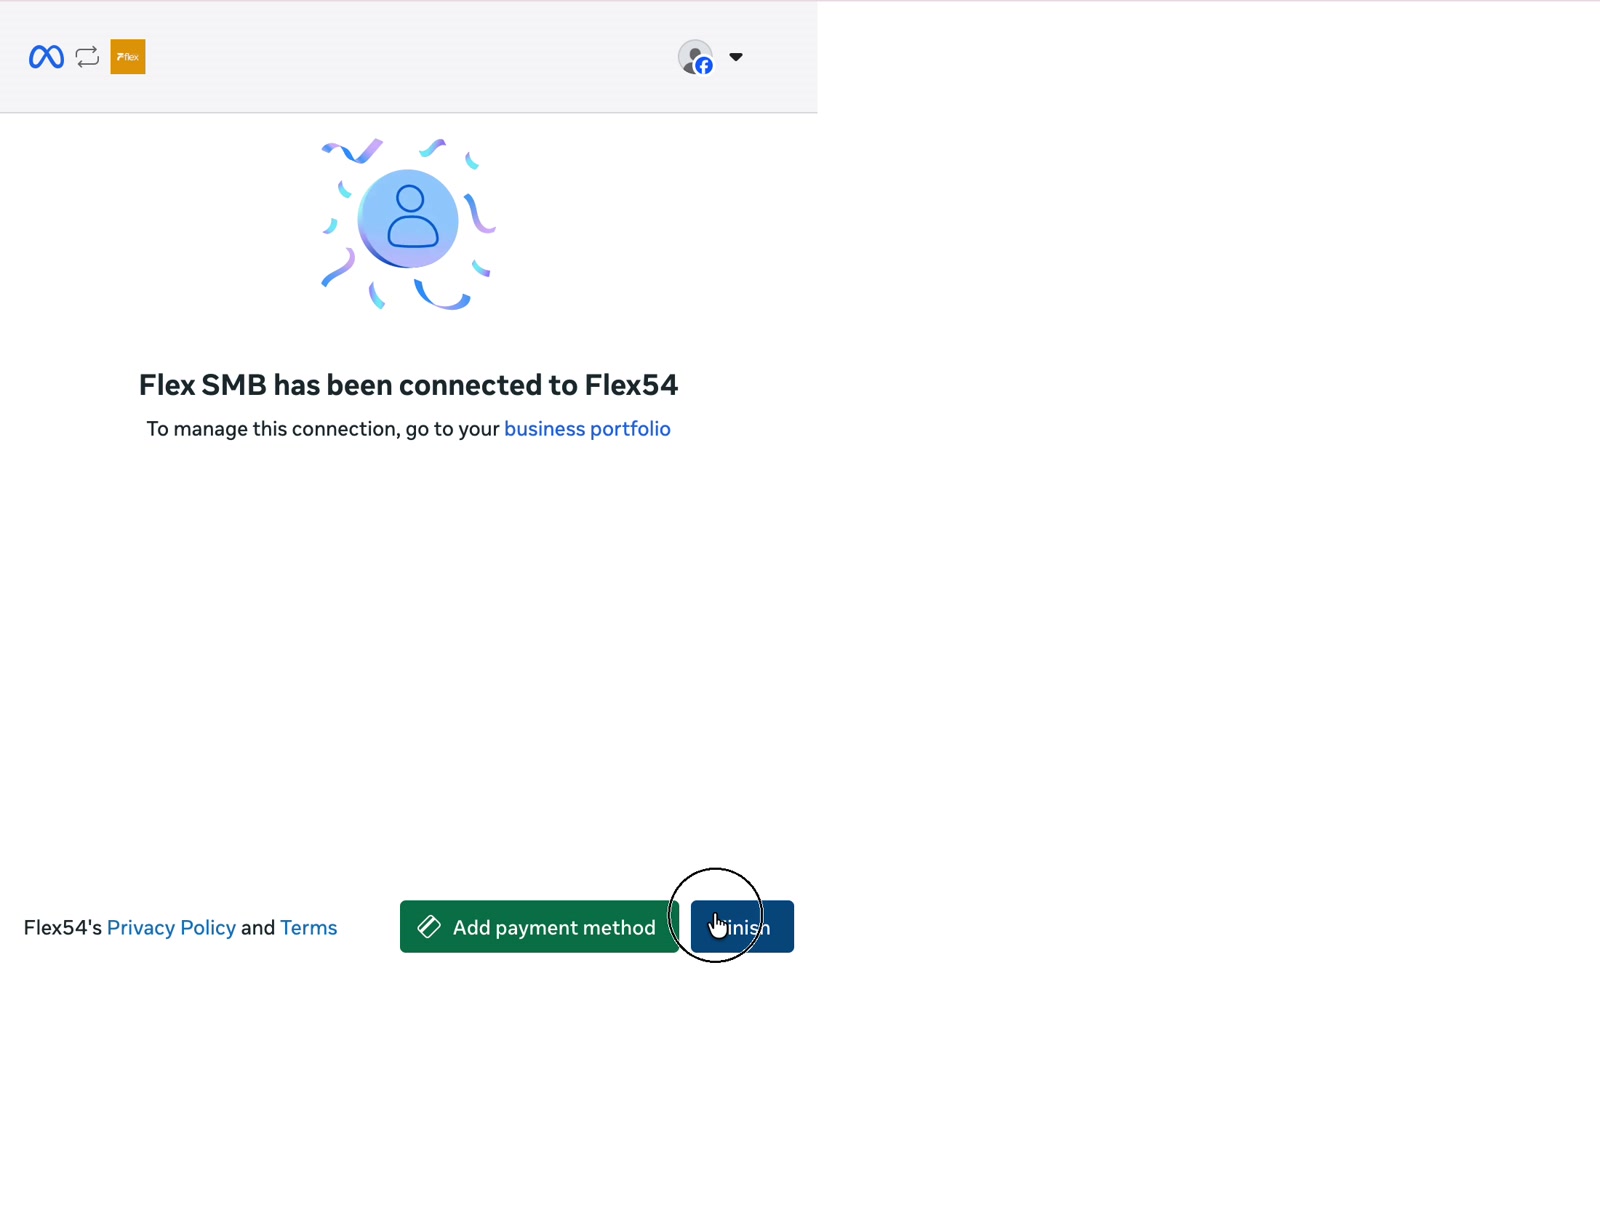
Example screen. Account names may differ in your workspace. - 07
Check the connected status
Send a test Messenger message and confirm it appears in Conversations.
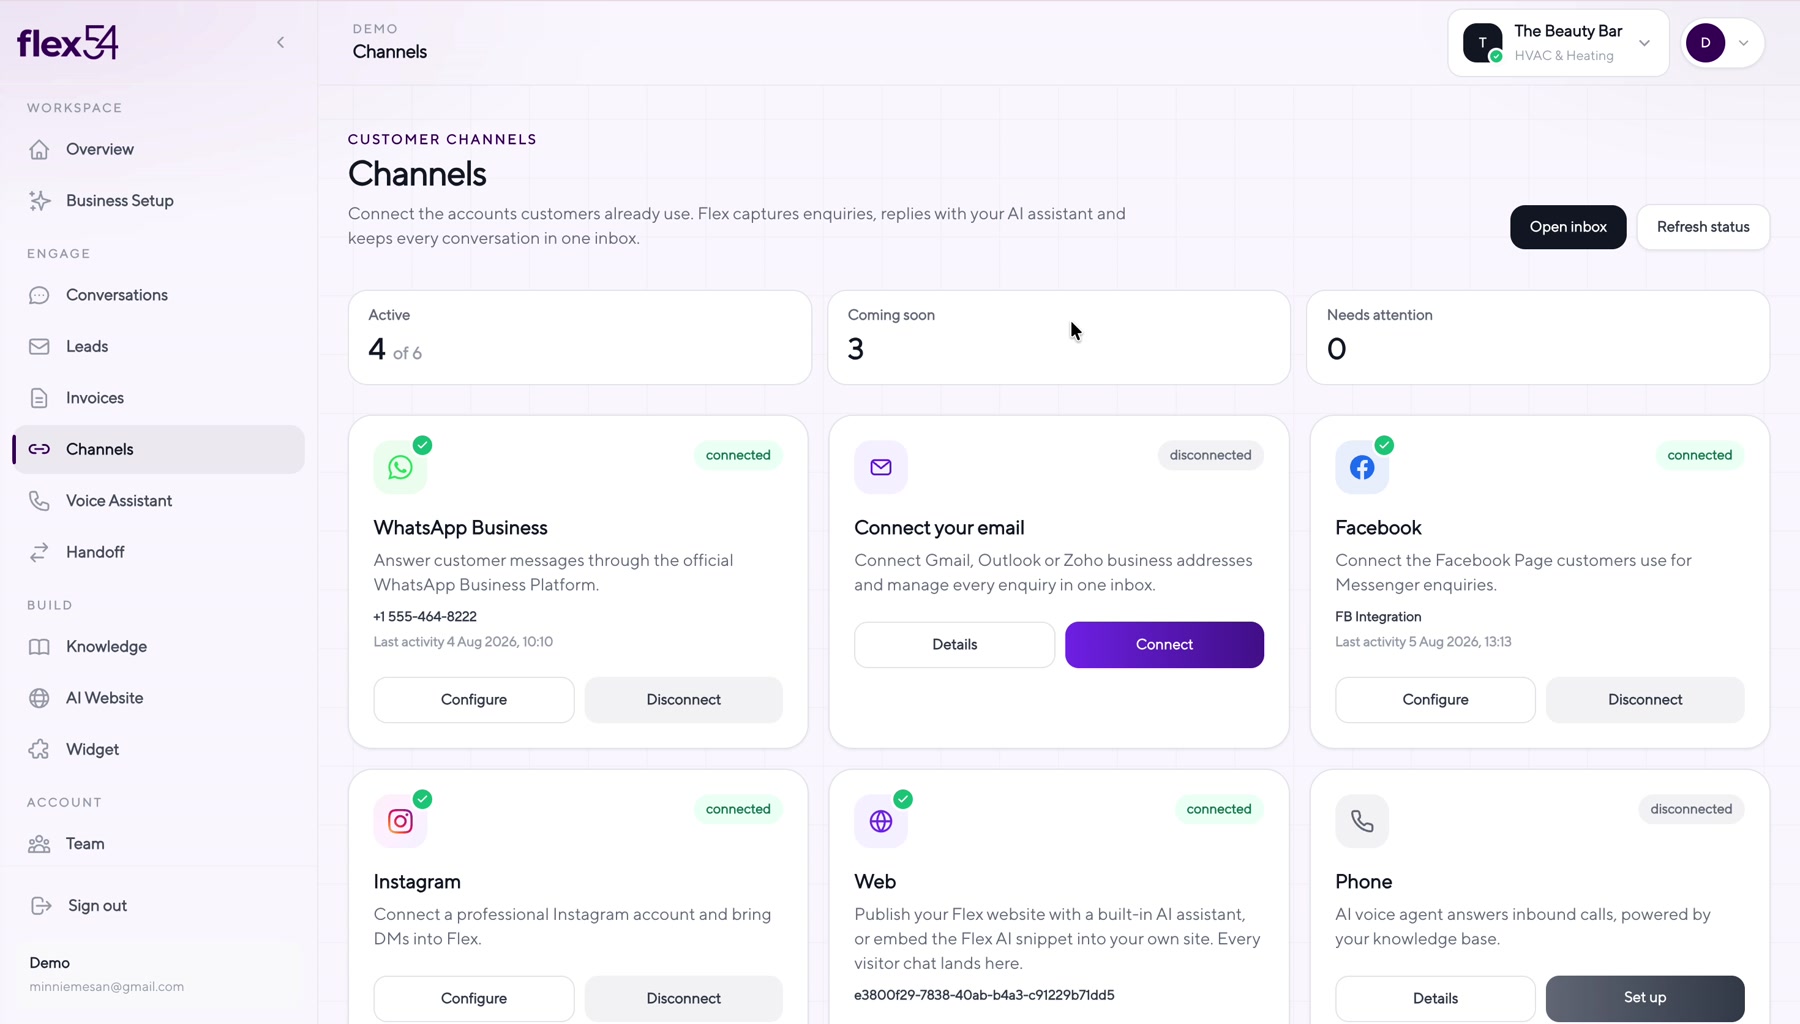
Example screen. Account names may differ in your workspace.
Connection complete
Confirm everything works
- Facebook shows Connected in Channels.
- A test Messenger message appears in Conversations.
- A reply from Flex54 reaches Messenger.
Troubleshooting
If something doesn't work
The Page is missing
Ask a Business Portfolio administrator to grant your Facebook profile full control of the Page.
Messages do not arrive
Confirm the Page is published and Messenger is enabled.